How To Clean Wood Furniture Before Painting
Proper preparation is paramount when undertaking a furniture painting project. The lifespan and appearance of a newly painted piece hinges not only on the quality of the paint but also on the initial cleaning process. Neglecting to thoroughly clean wood furniture before applying paint can lead to adhesion issues, uneven finishes, and ultimately, a less-than-desirable result. This article will outline the essential steps and considerations for effectively cleaning wood furniture in preparation for painting.
The necessity of cleaning stems from the fact that wood furniture, regardless of its age or apparent cleanliness, invariably accumulates contaminants over time. These contaminants can include dust, grime, grease, wax, polish residue, and even mold or mildew in humid environments. These substances, if left unaddressed, will interfere with the paint's ability to properly bond to the wood surface, resulting in peeling, chipping, or blistering. Furthermore, contaminants can create an uneven surface, leading to a blotchy or textured finish that detracts from the overall aesthetic.
Prior to beginning the cleaning process, it is crucial to gather the necessary supplies. These supplies will generally include the following: drop cloths to protect the surrounding area, cleaning solutions appropriate for wood, a soft-bristled brush (such as a toothbrush or a scrub brush), a sponge or clean cloths, a vacuum cleaner with a brush attachment, painter's tape, and safety glasses and gloves to protect the user.
Assessing The Furniture's Condition and History
Before beginning any cleaning, a thorough assessment of the furniture is crucial. This involves visually inspecting the piece for any existing damage, such as scratches, dents, or loose veneer. Identifying any potential problems allows for addressing them before they are exacerbated by the cleaning or painting process. It is also important to consider the furniture's history. Has it been heavily waxed, polished, or subjected to harsh cleaning chemicals in the past? This knowledge will inform the choice of cleaning solutions and methods.
Determine the type of finish that is currently on the furniture. Is it a varnish, lacquer, paint, or wax? Different finishes respond differently to cleaning solutions. Testing a small, inconspicuous area with the chosen cleaning solution is always recommended to ensure it doesn’t damage the existing finish. If the existing finish is heavily damaged or glossy, it may require sanding or stripping before cleaning to ensure proper paint adhesion. Mildew or mold growth, especially in humid environments, requires specific cleaning solutions designed to kill these organisms without damaging the wood. Consult with a professional when dealing with extensive mold or potential lead paint issues.
Pay close attention to areas that are likely to accumulate dirt and grime, such as corners, carvings, and around hardware. These areas often require more focused cleaning and attention. Consider the age of the furniture and the potential presence of lead paint. If there is a suspicion of lead paint, it's crucial to take extra precautions, including wearing a respirator and using a wet cleaning method to minimize the risk of lead dust exposure. Consult with a professional environmental testing service if lead paint is suspected.
The Cleaning Process: Step-by-Step
Once the furniture’s condition has been assessed, the cleaning process can commence. This process typically involves several steps, including dusting, washing, and degreasing, each playing a vital role in preparing the surface for painting.
The first step is to remove loose dust and debris. Use a vacuum cleaner with a brush attachment to thoroughly vacuum the entire piece of furniture, paying close attention to crevices, drawers, and any upholstered areas. Follow up with a tack cloth to remove any remaining dust particles. Tack cloths are designed to pick up fine dust that a vacuum might miss. This step is crucial for achieving a smooth and even paint finish.
Next, wash the furniture with a mild cleaning solution. A solution of warm water and dish soap is often sufficient for removing general dirt and grime. Avoid using harsh chemicals or abrasive cleaners, as these can damage the wood finish. Dip a soft cloth or sponge into the cleaning solution, wring out excess water, and gently wipe down the entire surface of the furniture. Pay particular attention to areas that are visibly dirty or stained. Change the cleaning solution frequently to prevent spreading dirt around. For stubborn stains, try using a paste of baking soda and water. Apply the paste to the stain, let it sit for a few minutes, and then gently scrub with a soft brush. Rinse thoroughly with clean water and dry with a clean cloth.
If the furniture has been heavily waxed or polished, it may be necessary to degrease the surface. Mineral spirits or denatured alcohol can be used to remove wax and polish residue. Test these solvents on an inconspicuous area first to ensure they don’t damage the finish. Apply the solvent to a clean cloth and gently wipe down the furniture. Be sure to work in a well-ventilated area and wear gloves to protect your skin. After degreasing, wipe the furniture down with a clean, damp cloth to remove any remaining solvent residue.
For furniture with mold or mildew, use a solution of diluted bleach and water (1 part bleach to 10 parts water). Apply the solution to the affected areas, let it sit for a few minutes, and then scrub with a soft brush. Rinse thoroughly with clean water and allow the furniture to dry completely before painting. Wear gloves and eye protection when working with bleach.
Rinsing thoroughly is vital. Any remaining cleaning solution can interfere with paint adhesion. Use a clean, damp cloth to wipe down the entire piece of furniture, ensuring that all traces of soap or solvent are removed. Repeat this process as needed until the water runs clear. Allow the furniture to dry completely before proceeding to the next step.
Addressing Specific Problem Areas and Materials
Certain areas and materials may require specialized cleaning techniques. For instance, hardware such as knobs, handles, and hinges often accumulate dirt and grime and may need to be removed and cleaned separately. Upholstered areas, if present, require different cleaning methods than wood surfaces.
Remove hardware such as knobs, handles, and hinges before cleaning. These items can be soaked in warm, soapy water to loosen dirt and grime. Use a small brush to scrub away any stubborn residue. Rinse the hardware thoroughly and allow it to dry completely before reattaching it to the furniture. Consider replacing old or damaged hardware to give the furniture a fresh, updated look.
Upholstered areas should be cleaned separately using appropriate upholstery cleaning methods. Vacuum the upholstery to remove loose dirt and debris. Use a mild upholstery cleaner and a soft brush to gently clean the fabric. Blot the area with a clean cloth to remove excess moisture. Allow the upholstery to dry completely before painting the wood frame. Protect the upholstery with painter's tape or plastic sheeting to prevent paint splatters.
When dealing with veneer, use extra caution. Veneer is a thin layer of wood that is glued to a substrate and can be easily damaged by excessive moisture or harsh chemicals. Avoid using abrasive cleaners or excessive amounts of water on veneer surfaces. Instead, use a gentle cleaning solution and a soft cloth to carefully wipe down the veneer. Dry the veneer immediately with a clean cloth to prevent warping or lifting.
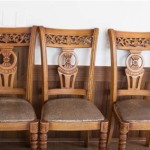
For furniture with intricate carvings, use a soft-bristled brush, such as a toothbrush, to clean hard-to-reach areas. Gently scrub the carvings to remove dirt and grime. Use a cotton swab dipped in a mild cleaning solution to clean delicate areas. Be careful not to damage the carvings during the cleaning process.
After cleaning, inspect the furniture for any remaining residue or imperfections. If necessary, repeat the cleaning process or address any specific problem areas. Ensure that the furniture is completely dry before proceeding to the next step in the painting process. Proper preparation is key to achieving a professional-looking and long-lasting paint finish.

How To Clean A Piece Of Furniture Before Painting My Creative Days

Cleaning Furniture Cabinets Before Painting The Purple Painted Lady

How To Clean Furniture Before Painting

How To Clean And Prep Wood Furniture Before Painting Do Dodson Designs

How To Clean Furniture Before Painting Step By Guide

How To Clean And Prep Wood Furniture Before Painting Do Dodson Designs

How To Prepare Furniture For Paint Meg Del Design

5 Simple Steps To Paint And Transform Any Piece Of Dark Furniture Recreated Designs

How To Remove Stain From Furniture Do This Get A Modern Look

Furniture Sanding 101 How To Sand Wood Little House Of Four Creating A Beautiful Home One Thrifty Project At Time
See Also