How to Stain Painted Furniture
Staining painted furniture can dramatically alter its appearance, offering a cost-effective way to revitalize existing pieces. This process allows for the creation of unique, layered finishes, adding depth and character. However, achieving a successful stained finish on previously painted furniture requires careful preparation and execution. This article outlines the necessary steps to achieve professional-looking results.
The initial step involves assessing the existing paint. Determine whether the paint is oil-based or water-based. This distinction significantly impacts the subsequent steps. Oil-based paint is generally more durable and requires more aggressive preparation than water-based paint. A simple test involves rubbing a cotton ball soaked in denatured alcohol on an inconspicuous area of the furniture. If the paint comes off, it's likely water-based. If not, it's likely oil-based.
Once the paint type is determined, the next stage is surface preparation. This crucial step ensures proper stain adhesion and prevents peeling or chipping. Regardless of the paint type, cleaning the furniture is essential. A thorough cleaning with a mild detergent and water removes dirt, grease, and grime that could interfere with the staining process. Allow the furniture to dry completely after cleaning.
For furniture with oil-based paint, sanding is necessary to create a suitable surface for the stain. Medium-grit sandpaper (120-150 grit) is recommended for initial sanding, followed by fine-grit sandpaper (220 grit) for smoothing. This process creates microscopic scratches in the paint, allowing the stain to penetrate. Thorough sanding is critical for achieving a uniform finish.
If the furniture has water-based paint, the approach can vary. While sanding is often recommended for optimal results, a deglosser can sometimes suffice. A deglosser chemically etches the surface, creating a better bonding surface for the stain. Follow the manufacturer's instructions carefully when using a deglosser. Whether sanding or using a deglosser, ensure the surface is clean and dust-free before proceeding.
After preparing the surface, apply a wood conditioner. This step is particularly important for softwoods like pine or fir, which tend to absorb stain unevenly. Wood conditioner helps to regulate stain absorption, resulting in a more uniform color. Apply the conditioner according to the manufacturer's instructions and allow it to dry completely before staining.
Selecting the appropriate stain is the next crucial step. Oil-based stains offer rich color and excellent penetration, while water-based stains are easier to clean up and have lower odor. Gel stains provide good control and are ideal for vertical surfaces. Test the chosen stain on an inconspicuous area of the furniture to ensure the desired color and finish. Consider the existing paint color as it will influence the final result.
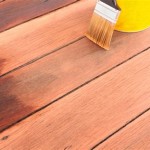
Applying the stain requires careful technique. Use a brush, rag, or foam applicator, working in the direction of the wood grain. Apply a thin, even coat, avoiding pooling or drips. Allow the stain to penetrate for the recommended time according to the manufacturer's instructions. The longer the stain sits, the deeper and richer the color will be.
After the stain has penetrated, wipe off any excess stain with a clean cloth. This step is crucial for achieving a uniform finish and preventing blotchiness. Work quickly and efficiently to avoid leaving streaks or lap marks. Allow the stain to dry completely according to the manufacturer's instructions.
Once the stain is dry, a protective topcoat is essential. This protects the stained finish from wear and tear and enhances its durability. Clear polyurethane is a popular choice, offering excellent protection and a variety of sheens. Apply the topcoat in thin, even coats, allowing each coat to dry completely before applying the next. Lightly sand between coats with fine-grit sandpaper for a smooth, professional finish.
Proper ventilation is essential throughout the entire staining process. Work in a well-ventilated area or outdoors to avoid inhaling fumes from the stain, paint stripper, or topcoat. Always wear appropriate safety gear, including gloves and eye protection. Disposing of used rags and materials properly is crucial to prevent spontaneous combustion, particularly when using oil-based products.
Transforming painted furniture with stain offers a rewarding way to update and personalize décor. By following these steps, achieving a professional and long-lasting finish is possible. Remember to carefully consider each stage of the process, from assessing the existing paint to applying the final topcoat. This attention to detail will ensure a successful and beautiful outcome.

How To Apply Paint That Looks Like Stain 9 Shade Options

Painting Furniture Stained And Painted Mix

Gel Stain Over Paint Works On Any Surface

Easiest Gel Stain Over Paint Tutorial Ultimate Diy Guide

You Can Stain Over Paint How To Painted Wood Furniture

Painting Furniture Stained And Painted Mix

How To Stain Over Paint 12 Steps With S Wikihow

Stained And Painted Furniture

How To Paint A Dresser With Beautiful Timeless Look

Easiest Gel Stain Over Paint Tutorial Ultimate Diy Guide